Cura Folders

Windows

$User is your user’s home directory, e.g. C:\Users\user

Preferences:
$User/AppData/Roaming/cura/2.6/cura.cfg

Settings:
$User/AppData/Roaming/cura/2.6/

Mac OSX

$User is your user’s home directory, e.g. /Users/user

Preferences:
$User/.cura/cura.cfg

Settings:
$User/.cura/settings/

New version:

~/Library/Application Support/cura/

Linux

$User is your user’s home directory, e.g. /home/user

Preferences:
$User/.config/cura/cura.cfg

Settings:
$User/.local/share/cura/settings/

Anet A6/A8 OS X and Windows Drivers

Windows

A fully signed drivers for Windows can be found below:

Mac OS-X

Sierra

(Added: October, 2016)

The Version 1.3 of the driver available on the vendor’s website causes a crash on Mac OS-X Sierra. Thankfully, Adrian Mihalko patched the driver, and made it available to the public.

El Capitan

(Added: Nov 22, 2015)

Many instructions down below were written for the old driver, which was not signed, and therefore was not working out of the box on OS-X Yosemite and El Capitan. The latest driver appears to be signed, and should work out the box. The new driver is here: CH34x_Install.zip (111Kb).

Thanks to Björn’s Techblog for posting the driver.

Inside the driver is a brief README with the following instructions:

Driver README

CH34X USB-SERIAL DRIVER INSTALLATION INSTRUCTIONS Version: V1.0 Copyright (C) Jiangsu Qinheng Co., Ltd. Support System: OSX 10.9 and above

Installation Process: * Extract the contents of the zip file to a local installation directory * Double-click CH34x_Install.pkg * Install according to the installation on procedure * Restart after finishing installing

After the installation is completed, you will find serial device in the device list(/dev/tty.wchusbserial*), and you can access it by serial tools.

If you can’t find the serial port then you can follow the steps below:

  1. Open terminal and type ‘ls /dev/tty*’ ande see is there device like tty.wchusbserial;
  2. Open ‘System Report’->Hardware->USB, on the right side “USB Device Tree” there will be device named “Vendor-Specific Device” and check if the Current is normal. If the steps upper don’t work at all, please try to install the package again.

Note: Please enter System Preferences ➜ Security & Privacy ➜ General, below the title “Allow apps downloaded from:” you should choose the choice 2 ➜ “Mac App Store and identified developers” so that our driver will work normally.


Older Driver

This older version requires some hacking in order to get it to work. I am leaving instructions just in case someone needs it, or the new driver does not work for someone.

Download The Driver

There are two main sites that people mention in the discussions about the driver:

  • Chinese company that developed it: http://www.wch.cn/downloads.php?name=pro&proid=178
    • This driver appears newer than on the second link, and is from Dec 2013.
    • Note: for me that site took a long long time to load, and then it took forever to download this tiny driver, so I put up a copy here CH341SER_MAC.ZIP (256Kb), so that you don’t have to wait. Hopefully they won’t go after me for mirroring their driver 🙂
  • Second site is the Russian company that sells the USB programmer based on this chip: http://www.5v.ru/ch340g.htm but this site only has an older version of the driver, from 2012, so I do not recommend downloading it.

Pre-Installation

Note: the following pre-installation steps are only required on the two most recent versions of OS-X Yosemite and El Capitan. It is because the driver is not signed properly from Apple’s perspective. We are waiting on the developer to update the driver so that these pre-installation steps are no longer needed.

OS-X El Capitan Steps (Only For The Older Driver!)

These are not needed for the newer driver above.

  • Reboot and press ⌘-R immediately after the chime to enter Recovery Mode
  • Open Terminal from the recovery mode
  • run the command csrutil enable --without kext
  • Reboot.
Thanks to this post for these instructions.

OS-X Yosemite Steps

  • Open Terminal Application (it’s located in /Application/Utilities) and type this command once you see a prompt:
  • sudo nvram boot-args="kext-dev-mode=1"
  • Reboot.
see this post if you wish to know more details.

Installation

  • Download the driver from here: CH341SER_MAC.ZIP (256Kb)
  • Double click the ZIP file do unzip it
  • Open the folder ~/Downloads/CH341SER_MAC
  • Run installer found in that folder
  • Restart when asked.

Usage

If the driver properly loaded, you should see the device in you /dev folder (this is for advanced command-line users of OSX only). On my machine it was called /dev/cu.wchusbserial1441140

This port is showing up correctly in Arduino 1.0.6 and Arduino 1.5.8.

However, if you are using the Eclipse Plugin, it is not smart enough to list this port in the list of available serial ports (either in project properties, or in the serial monitor). You will have to type the entire thing yourself: /dev/cu.wchusbserial1441140 and then Eclipse can upload your sketch.

That’s it! You should be ready to use the drivers and the board.

References


Source:
http://kig.re/2014/12/31/how-to-use-arduino-nano-mini-pro-with-CH340G-on-mac-osx-yosemite.html

How to print directly from CURA 2.3.1 to USB Anet A6/A8 printer.


2016-anet-a6-3d-printer-big-manufacturer-upgrade-reprap-prusa-i3-3d-printer-kit-diy-with

First… important information from Ultimaker forum:

“USB printing is possible with the Ultimakers it’s not recommended because the amount of data to transfer is important. It seems that USB printing can be un-reliable because there can be some small disconnections that can create errors in printing.”
DidierKlein

about_cura

1 – Ultimaker Cura 2.3.x+  download link:
https://ultimaker.com/en/products/cura-software

2 – Install the Cura (Mac or Windows)

3 – add printer settings to printer definitions folder (open app content and search for this folder), example:

create new file with name: “anet_a6.def.json”:

{
    "id": "anet_a6",
    "version": 2,
    "name": "Anet A6",
    "inherits": "fdmprinter",
    "metadata": {
        "visible": true,
        "author": "JP",
        "manufacturer": "Anet",
        "category": "Anet",
        "file_formats": "text/x-gcode",
        "icon": "icon_ultimaker2",
        "platform": "prusai3_platform.stl"
    },

    "overrides": {
        "machine_name": { "default_value": "Anet A6" },
        "machine_heated_bed": {
            "default_value": true
        },
        "machine_width": {
            "default_value": 220
        },
        "machine_height": {
            "default_value": 190
        },
        "machine_depth": {
            "default_value": 200
        },
        "machine_center_is_zero": {
            "default_value": false
        },
        "machine_nozzle_size": {
            "default_value": 0.4
        },
        "material_diameter": {
            "default_value": 1.75
        },
        "machine_nozzle_heat_up_speed": {
            "default_value": 2
        },
        "machine_nozzle_cool_down_speed": {
            "default_value": 2
        },
        "machine_head_polygon": {
            "default_value": [
                [-75, -18],
                [-75, 35],
                [18, 35],
                [18, -18]
            ]
        },
        "gantry_height": {
            "default_value": 55
        },
        "machine_gcode_flavor": {
            "default_value": "RepRap (Marlin/Sprinter)"
        },
        "machine_start_gcode": {
            "default_value": "G21 ;metric values\nG90 ;absolute positioning\nM82 ;set extruder to absolute mode\nM107 ;start with the fan off\nG28 X0 Y0 ;move X/Y to min endstops\nG28 Z0 ;move Z to min endstops\nM84 ;steppers off\nM0 S12 ;wait 12 seconds\nM17 ;turn steppers on\nG1 Z10.0 F300 ;move the platform down 10mm\nG92 E0 ;zero the extruded length\nG1 F200 E8 ;extrude 8mm of feed stock\nG92 E0 ;zero the extruded length again\nM0 S5 ;wait 5 seconds\nG1 F9000\n;Put printing message on LCD screen\nM117 Printing..."
        },
        "machine_end_gcode": {
            "default_value": "M104 S0 ;extruder heater off\nM140 S0 ;heated bed heater off (if you have it)\nG91 ;relative positioning\nG1 E-1 F300  ;retract the filament a bit before lifting the nozzle, to release some of the pressure\nG1 Z+4 E-5 X-20 Y-20 F9000 ;move Z up a bit and retract filament even more\nG28 X0 Y0 ;move X/Y to min endstops, so the head is out of the way\nG1 Y210 F9000 ;move out to get part off\nM84 ;steppers off\nG90 ;absolute positioning"
        }
    }
}

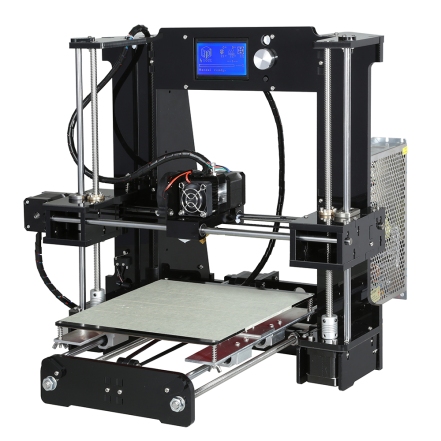
Now, it’s possible to configure the Anet but it’s not possible to print directly from usb.

Go to folder: “plugins/Usbprint” and follow the instructions:

1-open “USBPrinterOutputDevice.py “, comment all text with new programmer reference:

programmer = stk500v2.Stk500v2() 
to 
#programmer = stk500v2.Stk500v2()

not used after cura 2.5

Anet controller need time to start, add time for response by “T:” request:

if b"T:" in line:
    Logger.log("d", "Correct response for auto-baudrate detection received.")
    self._serial.timeout = 10
    sucesfull_responses += 1
       if sucesfull_responses >= self._required_responses_auto_baud:
       self._serial.timeout = 12 # Reset serial timeout"

Open “USBPrinterOutputDeviceManager.py” and change all lines with text:

"only_list_usb = True" to False;

Done..

Start CURA .. works 🙂

Execute script and services on Start-Up – RPi /Linux

pi

In order to have a command or program run when the Pi boots, you can add commands to the rc.local file. This is especially useful if you want to be able to plug your Pi in to power headless, and have it run a program without configuration or a manual start.

Example – Create autostart for one service and one bash/shell (*.sh):

sudo nano /etc/rc.local

Content:

#!/bin/sh -e
# rc.local
/wifiscan/startup.sh &            #<< startup bash
service yourservice start         #<< startup service 
/etc/init.d/cron start            #<< start cron for future usage with full path
exit 0

Now, your RPi it’s ready to auto-start your tasks!

>> create startup.sh file / bash:

sudo nano /YourFolder/startup.sh
#!/bin/bash

#example - update ntp clock
sudo service ntp stop
sudo ntpdate -s $NTP_SERVER
sudo service ntp start

echo "Today is $(date)"

>> set file permissions:

sudo chmod +x /YourFolder/startup.sh

>> create yourservice file:

sudo nano /etc/init.d/yourservice
#! /bin/sh
#/etc/init.d/wifiscan

### BEGIN INIT INFO
# Provides: YOURSERVICENAME
# Required-Start: $remote_fs $syslog
# Required-Stop: $remote_fs $syslog
# Default-Start: 2 3 4 5
# Default-Stop: 0 1 6
# Short-Description: start a program from boot
# Description: start YOURSERVICENAME program
### END INIT INFO

# Put any commands you always want to run here.

case "$1" in
start)
echo "Starting example"
# run the program you want to start
/YOURFOLDER/YOURBASH.sh
;;
stop)
echo "Stopping example"
# end the program you want to stop
killall YOURSERVICENAME
;;
*)
 echo "Usage: /etc/init.d/YOURSERVICENAME {start|stop}"
 exit 1
 ;;
esac

>> set file permissions:

sudo chmod +x /etc/init.d/yourservice

Your service is ready to start.

You need to restart your service at 01h00 o’clock daily | weekly ?? use crontab -e

crontab-format

sudo crontab -e  (note ... crontab -e != sudo crontab -e)
# Edit this file to introduce tasks to be run by cron.
#
# Each task to run has to be defined through a single line
# indicating with different fields when the task will be run
# and what command to run for the task
#
# To define the time you can provide concrete values for
# minute (m), hour (h), day of month (dom), month (mon),
# and day of week (dow) or use '*' in these fields (for 'any').#
# Notice that tasks will be started based on the cron's system
# daemon's notion of time and timezones.
#
# Output of the crontab jobs (including errors) is sent through
# email to the user the crontab file belongs to (unless redirected).
#
# For example, you can run a backup of all your user accounts
# at 5 a.m every week with:
# 0 5 * * 1 tar -zcf /var/backups/home.tgz /home/
#
# For more information see the manual pages of crontab(5) and cron(8)
#
# m h dom mon dow command
0 0 * * * /YOURFOLDER/remove_old_files_example.sh > /tmp/log 2>&1 # remove old files at 0h00 o'clock and add to log
0 1 * * * /etc/init.d/YOURSERVICE restart > /tmp/log 2>&1 # restart service at 1h00 o'clock and add to log

#test here :https://crontab.guru/examples.html

Visual Studio 2015 – M2Mqtt

Running MQTT subscriver on VS2015 with M2Mqtt lib.

1 – Create new “console application project”;

2 – Open “nuget package manager”, search “m2mqtt” and install

m2mqtt

Edit this code with your settings:

using System;
using System.Text;
using uPLibrary.Networking.M2Mqtt;
using uPLibrary.Networking.M2Mqtt.Messages;

namespace MqttSubscriver
{
 public class Program
 { 

 private const string IotEndpoint = "127.0.0.1";
 private const int BrokerPort = 1883; // no SSL 1883 or SSL 8883;
 private const string user = "user";
 private const string pw = "password";


 public static void Main(string[] args)
 {
 var subscriber = new Program();
 subscriber.Subscribe();
 }

 public void Subscribe()
 {
 //convert to pfx using openssl
 //you'll need to add these two files to the project and copy them to the output
 //var clientCert = new X509Certificate2("YOURPFXFILE.pfx", "YOURPFXFILEPASSWORD");
 //this is the AWS caroot.pem file that you get as part of the download
 //var caCert = X509Certificate.CreateFromSignedFile("root.pem"); // this doesn't have to be a new X509 type...
 //var client = new MqttClient(IotEndpoint, BrokerPort, true, caCert, clientCert, MqttSslProtocols.None);

 var client = new MqttClient(IotEndpoint, BrokerPort, false, null, null, MqttSslProtocols.None);

 //event handler for inbound messages
 client.MqttMsgPublishReceived += ClientMqttMsgPublishReceived;

 //client id here is totally arbitary, but I'm pretty sure you can't have more than one client named the same.
 client.Connect("listener",user,pw);
 

 // '#' is the wildcard to subscribe to anything under the 'root' topic
 // the QOS level here - I only partially understand why it has to be this level - it didn't seem to work at anything else.
 client.Subscribe(new[] { "test" }, new[] { MqttMsgBase.QOS_LEVEL_AT_LEAST_ONCE });

 while (true)
 {
 //listen good!
 }

 }

 public static void ClientMqttMsgPublishReceived(object sender, MqttMsgPublishEventArgs e)
 {
 Console.WriteLine("We received a message...");
 Console.WriteLine(Encoding.UTF8.GetChars(e.Message));
 }
 }
}

run and test with your mqtt publisher

see more here

MQTT introduction

mqtt

MQTT BROKER

Installation and Configuration

0 – State of the art – protocol
-> here

1 – Downloads:

-> mosquitto: https://mosquitto.org/download/

-> win32 OpenSSL : http://slproweb.com/products/Win32OpenSSL.html (compatible with x64 version)

->pthreads-win32 : ftp://sources.redhat.com/pub/pthreads-win32/dll-latest/dll/x86/ (or 64 version) – direct url

2 – Install win32 OpenSSL 

3 – Install mosquitto (MQTT)

4 – Unzip and copy pthreads files (x86 or x64 – try x86 if x64 not work)

-> Required DLLs: copy pthreadVC2.dll and past on mosquitto folder.

-> Required DLLs: copy libeay32.dll and ssleay32.dll (Look for these files in the OpenSSL-Win32 or OpenSSL-Win32\Bin folder) and past on mosquitto folder.

5- Open “command prompt” as administrator 

-> Go to mosquitto folder (or add to windows PATH):

cd "C:\Program Files (x86)\mosquitto"

5.1 – Test mosquitto service:

mosquitto.exe

-> Open new cmd and write “netstat -na”, and search “0.0.0.1:1883”, “127.0.0.1:1883” and “192.168.XX.XX:1883” -> It’s all ok if this happens.

netstat -na

5.2 – Change configuration file to require password:

-> Open: mosquitto.conf (in mosquitto folder) and uncomment:

allow_anonymous false
password_file "‪C:\Program Files (x86)\mosquitto\pwfile"

Press save.

5.3 – Create pwFile (user and passwords)

-> Open new cmd as admin, go to mosquitto folder and write:

mosquitto_passwd -c "C:\Program Files (x86)\mosquitto\pwfile" youruser
enter password

5.4 – Start mosquitto service with configuration file:

mosquitto.exe -c "C:\Program Files (x86)\mosquitto\mosquitto.conf" -v

6- Run SUBSCRIVER:

Open new cmd and write:

mosquitto_sub -h 127.0.0.1 -u YOURUSER -P YOURPASSWORD-p 1883 -t "#"
 (#-> listen all)

6- Run PUBLISHER:

Open new cmd and write:

mosquitto_pub -h 127.0.0.1 -u YOURUSER -P YOURPASSWORD -p 1883 -t "test" -m "ok"

pub

RESULT:

ok

Test BROKER with chrome Extention: MQTTLens

mqttlens